Flow was designed initially as a platform for one-time webinars and Meetings. Then we added webinar rooms for users who require long sessions (including 24/7, unlimited use). Our latest addition is Recurring Events with Automation tools that help you create a series of events, either manually or with automation, pre-record courses, and fully automate events.
With this option, you can set up weekly or monthly schedules in a matter of seconds.
TABLE OF CONTENTS
- Main Features
- Creating a Recurring Event
- Pre-recording Recurring Events with AutoFlow Technology
- Registering for Recurring Events
Main Features
- Create recurring events with Weekly (daily or selected dates) and Monthly options

- Specify an dates with an ending date


- Specify global options (Registration page, banners and ads, presenters, etc.)
- Specify local options such as local media for each event, separate logins, separate recordings, and reports
- On-demand replays
- Make it a course or a series with pre-recorded media and full automation (without a host, you can execute the series)!
Creating a Recurring Event
Note: Recurring events have the same options as one-time events except the recurring options. To learn how to configure a general event, read this comprehensive and quick guide.
To set up recurring options in an event
- Click the + button at the upper right-hand corner

- Enter the event titles and description
- Select the "Recurring Type" to get the selection option for days

- Select the days you want the recurring event to occur
- Select the date and time
- You must select an end date
- Select the rest of the options and click Next
- Learn how to configure the next steps at https://support.flowapp.com/support/solutions/articles/12000066577-creating-or-editing-a-webinar-event
Pre-recording Recurring Events with AutoFlow Technology
Each event can be pre-recorded with separate media elements such as slides, screen share, etc. while you can use the same library (slides, video, surveys, etc.)Step 1: Create pre-recordings
- Log in to the admin page and click on the Recurring Events tab
- Find the recurring event(s) that you want to pre-record and click the Enter button

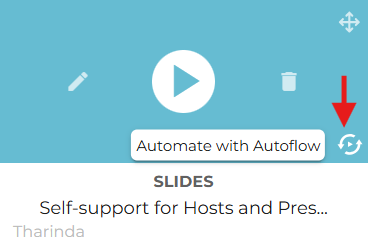
- When you join the webinar room, you can add any item you wish to use, for instance, a slideshow in this example
- Turn your audio and video devices on (mic/webcam) and laser for slides if necessary
- Click the pre-recording button
- Click the start button
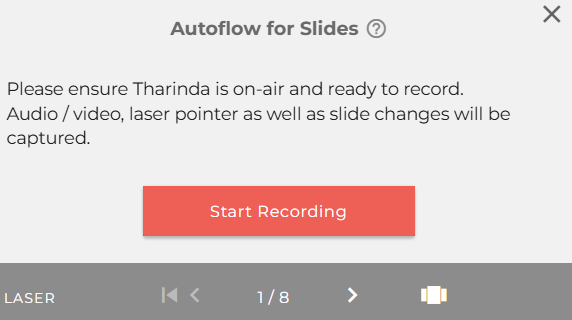
- Click the Stop button when your recording is over (an AutoFlow can be recorded up to 2 hours)
- Click Save
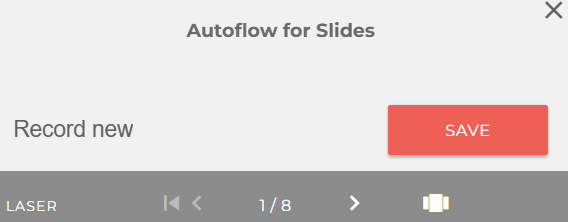
- Now let's go back to the storyboard item, wait a few seconds (30 seconds if the recording is long), and click the play button to verify

Now your pre-recording is ready. End the Prep-mode and go back to the Recurring Events tab in the admin page (What is prep-mode?)

Step 2: Automate Your Webinar
- Click the kebab icon in the event card

- Click the Edit option and then click Settings at the top

- Click the Advanced Options and then Auto-Start Event

Click Next and then the Push Changes button.
Go back to the Recurring Events. The event card now shows the Automated sign there

Registering for Recurring Events
- Click the Recurring events and then on any event card, click the Kebab icon at the upper left
- Click Summary

- From the summary, obtain the link - you can click Copy

- When the registrant opens the link, he/she can choose to register for which event(s) or all events (depending on which event link you obtain, it will select the event automatically, first event in this example)

Limitations
- The set of events you create follows the same configuration, such as the title, description, event image, and all the other options. You can include the full description and series information in the description of any event in the set, for instance. Modifying any event in the set affects all the events
However, the webinar room configurations are INDIVIDUAL. They don't get mixed up.
Once an event of the set ends, you can modify the next event if you want to change anything (it also applies to the set of events, not just individually). We are planning to make the set follow individual events in the next update. - You must create an event 24 hours before the start of the first event in the set. You cannot set up a recurring event to occur right now or within today. Use a one-time event for quick, ad-hoc events.
Was this article helpful?
That’s Great!
Thank you for your feedback
Sorry! We couldn't be helpful
Thank you for your feedback
Feedback sent
We appreciate your effort and will try to fix the article